
Solo developer of Spiral Fantasy
Perfecting Unity’s Billboard Shader for 2D Characters – Part 1
Written by Thomas David Walker (TW0)
From a necessity to an art style
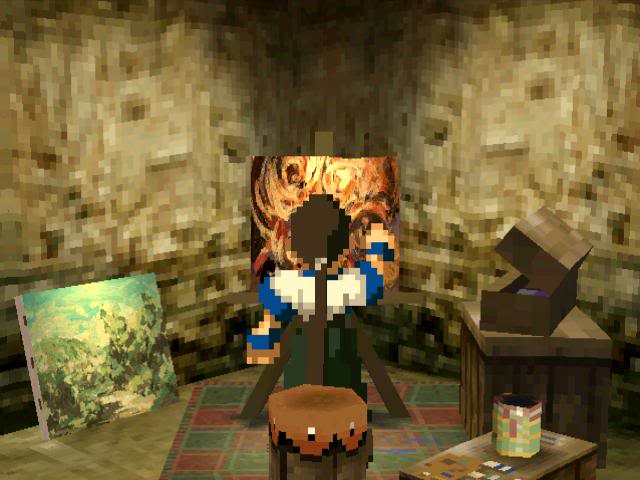 Xenogears (Squaresoft) (screenshot by The Dark Id).
If you grew up with a PS1 or a DS, I’m almost certain that some of your favourite games used 2D characters in a 3D environment. Not only did this give you control of the camera to look for hidden items, it also allowed for much more expressive characters than 3D models could achieve at standard definition.
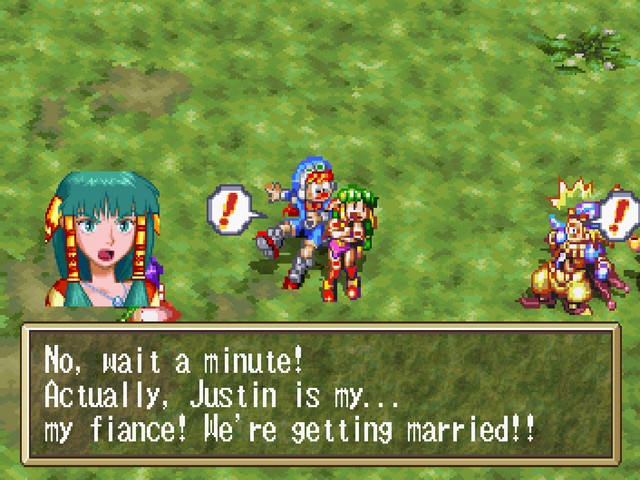 Grandia (Game Arts) (screenshot by Edward_Tohr).
However, at the time this was seen as a compromise to make games on the scale that RPGs were known for and with limited 3D capabilities. Developers often had to choose whether to use 2D characters in a full 3D environment or 3D characters on a 2D pre-rendered background. Once the hardware allowed for both 3D characters and environments, the art style saw very little use until the release of Octopath Traveller in 2018, which Square Enix coined as HD2D. This combined authentic 16/32-bit artwork with modern rendering techniques such as normal maps, dynamic shadows and post-processing.
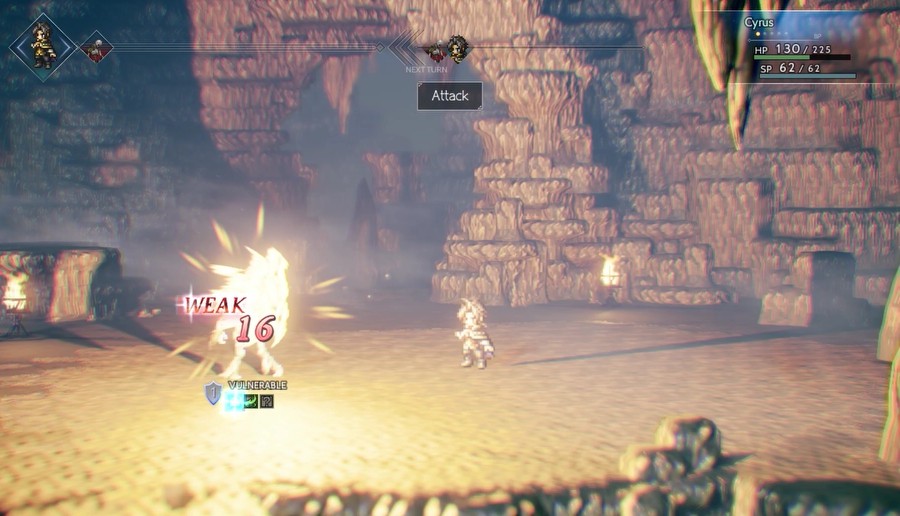 Octopath Traveller (Square Enix) (screenshot by Mega64).
One of my first experiments with game engines was a 3D recreation of Aliahan, the first town of Dragon Quest III. I couldn’t be happier that it is getting an official HD2D remake. There are a few differences with how I use the art style though. I don’t rely on post-processing effects outside of basic colour correction. While bloom can help simulate the light bleed of CRT displays, the excessive depth of field blur for the tilt-shift effect should be used sparingly, and doesn’t make much sense unless the game is set in a miniature environment like Pikmin.
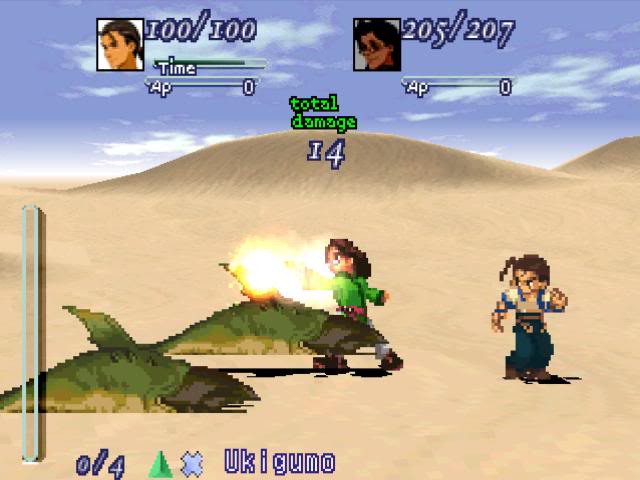 Xenogears (Squaresoft) (screenshot by The Dark Id).
Billboards in Unity
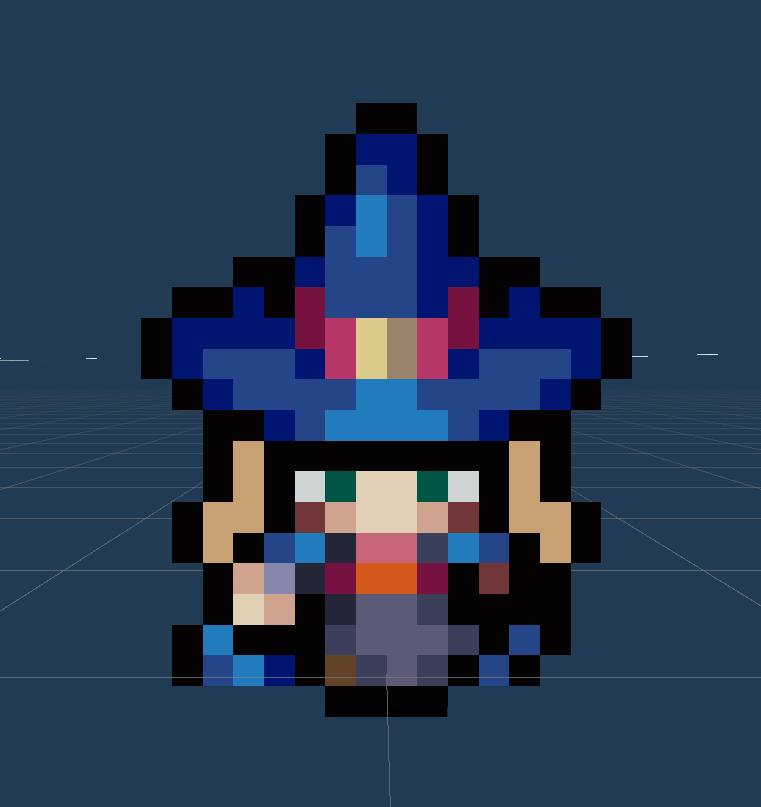
Achieving this art style in Unity was not as straightforward as I expected. I wanted the characters to have surface normals, shadows, perspective projection and a dissolve effect. Unity’s sprite renderer has issues in a 3D environment due to sorting, especially with transparent effects like water, and it does not support normal maps.
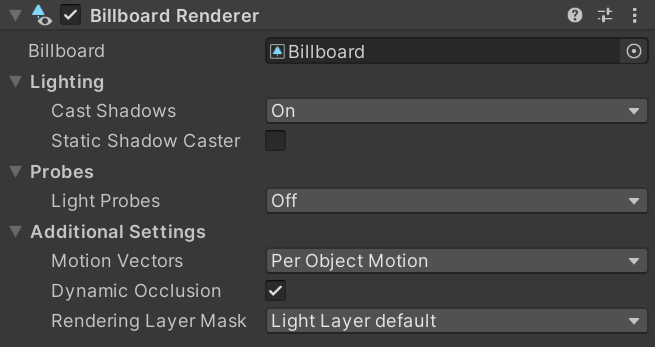
The Billboard Renderer is a component that is intended to be used on imposters, which are pre-rendered copies of a 3D model that replace it when viewed from a distance. Both SpeedTree and Unity’s built-in trees use them at their highest LOD (Level of Detail), so the easiest way to get started is to create or import a tree asset and remove all the 3D models, leaving just the billboard.
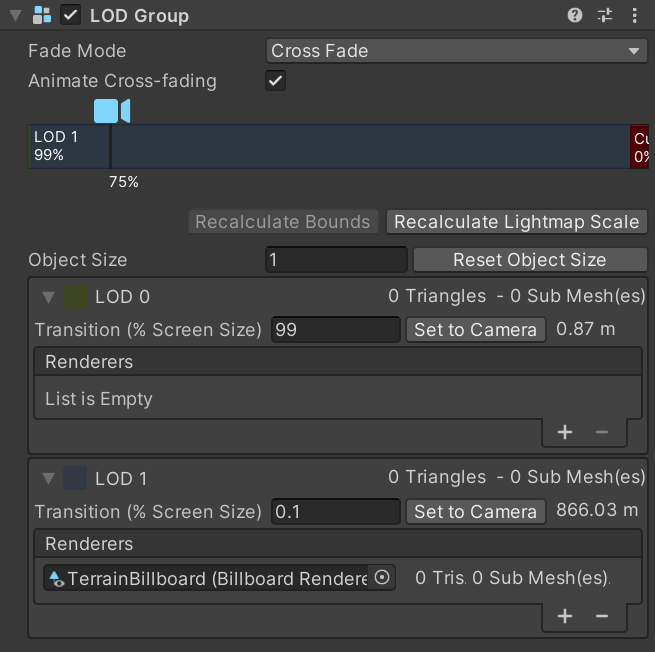
This also gives you the LOD Group component which can be used to fade out the billboard when it is too close or too far from the camera. In this example, the billboard fades out with a dissolve effect if it takes up more than 99% of the height of the screen or less than 0.1%. You’ll also need to set the Object Size to match the height of the billboard. However, if you want more control, like being able to fade out the character upon defeat, the LOD Group can be removed and this can be done in the shader instead.
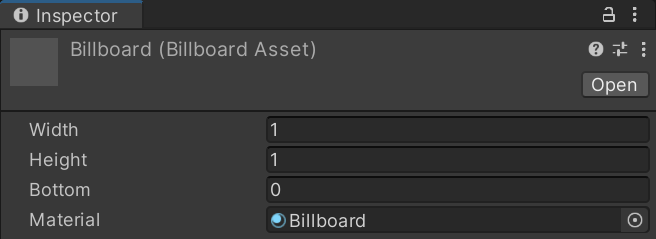
The Billboard Renderer component requires a Billboard Asset, which contains the texture of the character facing multiple directions and displays the correct one based on the angle they are facing and the angle of the camera. Other billboard implementations have to do this in a script or a shader, which can be more complicated if you want to support billboards with different numbers of angles.
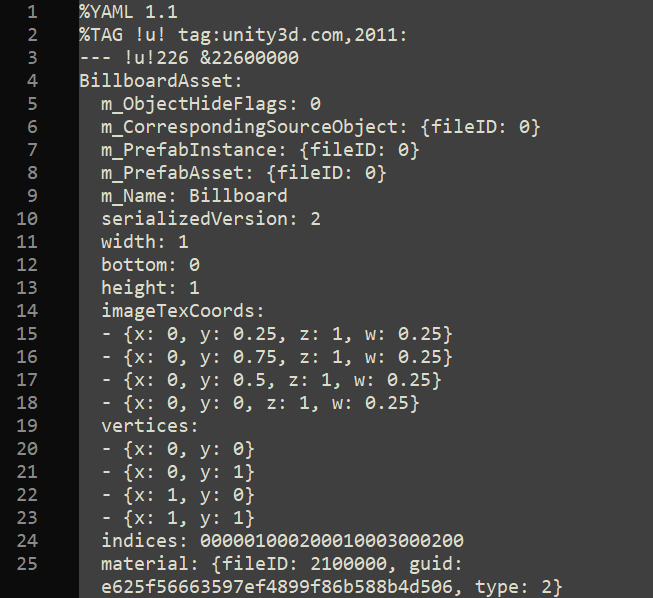
With a Billboard Asset you just need to tell it how many angles are in the sprite sheet and the UVs and it will do the work for you. Animating characters is as simple as adding an offset to the UVs each frame. You can also set the width and height, as well as a vertical offset to ensure that the character is aligned properly with the ground. In a later article I’ll explain how to create this asset with a C# script.
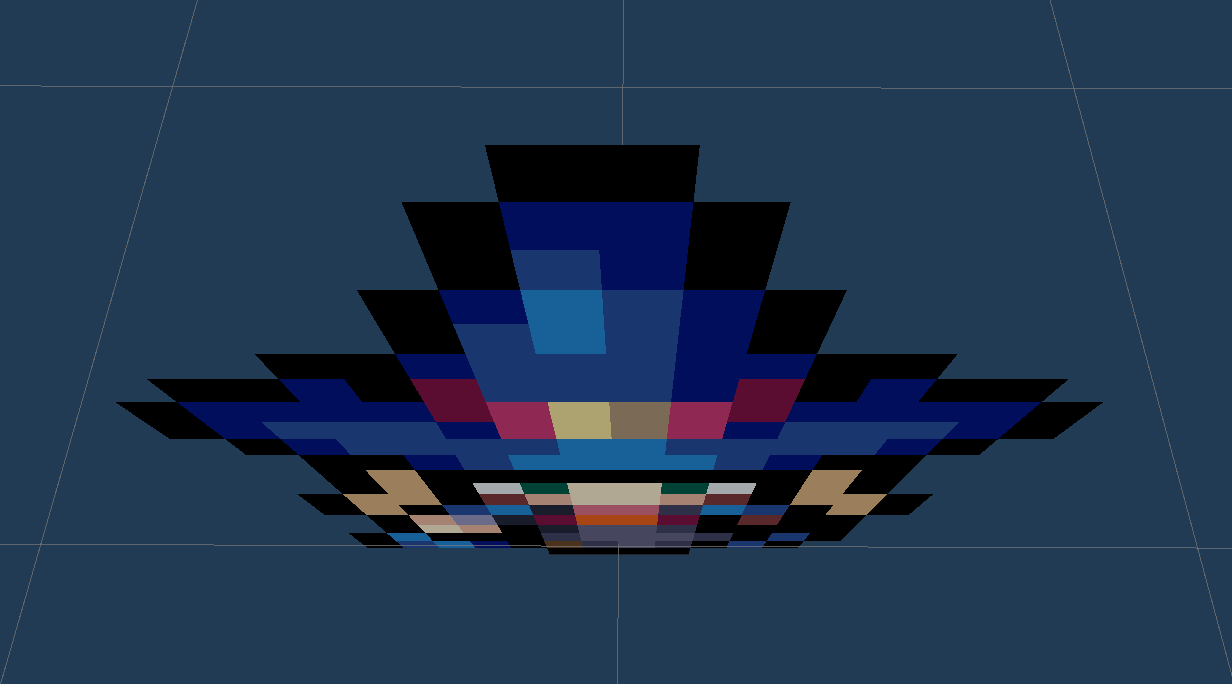
The main issue with the Billboard Renderer is what happens when you look at it from above. The billboard becomes razor-thin because only the x and z angles are rotated to face the camera. The shadow also has the same issue when the sun is directly above, since a shadow map is typically created from a camera at the position of the light source that captures the depth instead of the colour. This can be improved by adding a decal shadow, although it will not hide the real shadow being cast. Billboards will also receive their own shadows, so unless you can create a normal map that avoids this or you’re using a more recent version of URP that supports shadow layers, the character is almost always going to be half in shadow.
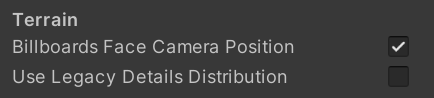
If you’d also like to use billboards for terrain details like trees, you can enable BILLBOARD_FACE_CAMERA_POS in the quality settings. This rotates billboards to face the centre of the screen instead of aligning with the camera plane, so two adjacent billboards will not change which one is rendered in front of the other as you rotate the camera. However, with this setting enabled their shadow caster will also be rotated, meaning that the width of the object’s shadow will vary drastically as you rotate the camera.
Solving the perspective issues
At this point, if you’re not familiar with writing shaders or the 3D trigonometry involved, then you’ll either need to accept these flaws or start looking for another solution. But what if we could change the shader to behave how we want it to?
Anyone working with URP should become familiar with ColinLeung-NiloCat, whose repos are fantastic examples for many visual effects that are also optimised for mobile devices. UnityURP-BillboardLensFlareShader is a shader that always faces the camera, so reproducing what the vertex shader does in Unity’s billboard shader should get the same effect.
First of all, you should create copies of the following files from /Packages/com.unity.render-pipelines.universal/Shaders/Nature/ in your project and rename them. If you aren’t using the latest version of Unity then you may want to get them from Unity’s Graphics repo. I’d suggest removing all instances of the word SpeedTree, including inside the files.
- SpeedTree7Billboard.shader
- SpeedTree7BillboardInput.hlsl
- SpeedTree7BillboardPasses.hlsl
- SpeedTree7CommonInput.hlsl
- SpeedTree7CommonPasses.hlsl
In your copy of BillboardPasses.hlsl, comment out lines 39 and 40:
input.vertex.xyz += billboardPos;
input.vertex.w = 1.0f;
billboardPos is calculated to rotate the billboard to face the camera on the x and z axes, but we’re going to move this to the vertex shader. You can also comment out the lines setting up billboardPos and widthScale and weightScale.
Next, comment out line 105:
output.clipPos = vertexInput.positionCS;
and replace it with this from URP_NiloCatExtension_BillboardLensFlare.shader:
// Make quad look at camera in view space
float3 quadPivotPosVS = TransformWorldToView(vertexInput.positionWS);
// Get transform.lossyScale
float2 scaleXY_WS = float2(
length(float3(GetObjectToWorldMatrix()[0].x, GetObjectToWorldMatrix()[1].x, GetObjectToWorldMatrix()[2].x)), // scale x axis
length(float3(GetObjectToWorldMatrix()[0].y, GetObjectToWorldMatrix()[1].y, GetObjectToWorldMatrix()[2].y))); // scale y axis
scaleXY_WS *= unity_BillboardSize.xy;
float3 posVS = quadPivotPosVS + float3(input.texcoord.xy * scaleXY_WS, 0); // Reconstruct quad 4 points in view space
posVS.x -= scaleXY_WS.x * 0.5; // Centre the billboard
posVS.y += unity_BillboardSize.z;
// Complete SV_POSITION's view space to HClip space transformation
output.clipPos = mul(GetViewToHClipMatrix(), float4(posVS, 1));
You should repeat this everywhere that output.clipPos is used in this file.
The main difference from the code in URP_NiloCatExtension_BillboardLensFlare.shader is how it calculates the billboard’s position in View Space.
float3 quadPivotPosOS = float3(0,0,0);
float3 quadPivotPosWS = TransformObjectToWorld(quadPivotPosOS);
float3 quadPivotPosVS = TransformWorldToView(quadPivotPosWS);
has been changed to
float3 quadPivotPosVS = TransformWorldToView(vertexInput.positionWS);
In the original version of the shader the position in Object Space is set to the origin (x=0, y=0, z=0). This is likely because lens flares are an overlay effect and giving it a position in the world might cause it to be occluded by 3D objects. We need to use the character’s actual vertices in World Space with vertexInput.positionWS, otherwise even if you move the billboard GameObject the character will not move from that position. This is why we needed to avoid changing input.vertex.xyzw before.
The other difference is that the lens flare has a fixed scale and aspect ratio, although the billboard needs to be shifted to the centre and resized. This uses the width, height and offset from the Billboard Asset so your character will be rendered with the correct scale and position. However, the scale factor applied to the GameObject will now have no effect.
In the next part, I’ll go through how to improve the shadows.
tags: